Materials
Materials are embedded into a .gltf or .glb file.
This document refers to materials that are imported in a 3D model. For materials defined via code to apply onto primitive shapes, see materials.
Note: You can’t currently dynamically change the materials of a 3D model from your scene’s code, unless this is a primitive shape.
Shader support
Not all shaders can be used in models that are imported into Decentraland. Make sure you use one of the following:
-
Standard materials: any shaders are supported, for example diffuse, specular, transparency, etc.
Tip: When using Blender, these are the materials supported by Blender Render rendering.
-
PBR (Physically Based Rendering) materials: This shader is extremely flexible, as it includes properties like diffuse, roughness, metalness and emission that allow you to configure how a material interacts with light.
Tip: When using Blender, you can use PBR materials by setting Cycles rendering and adding the Principled BSDF shader. Note that none of the other shaders of the Cycles renderer are supported.
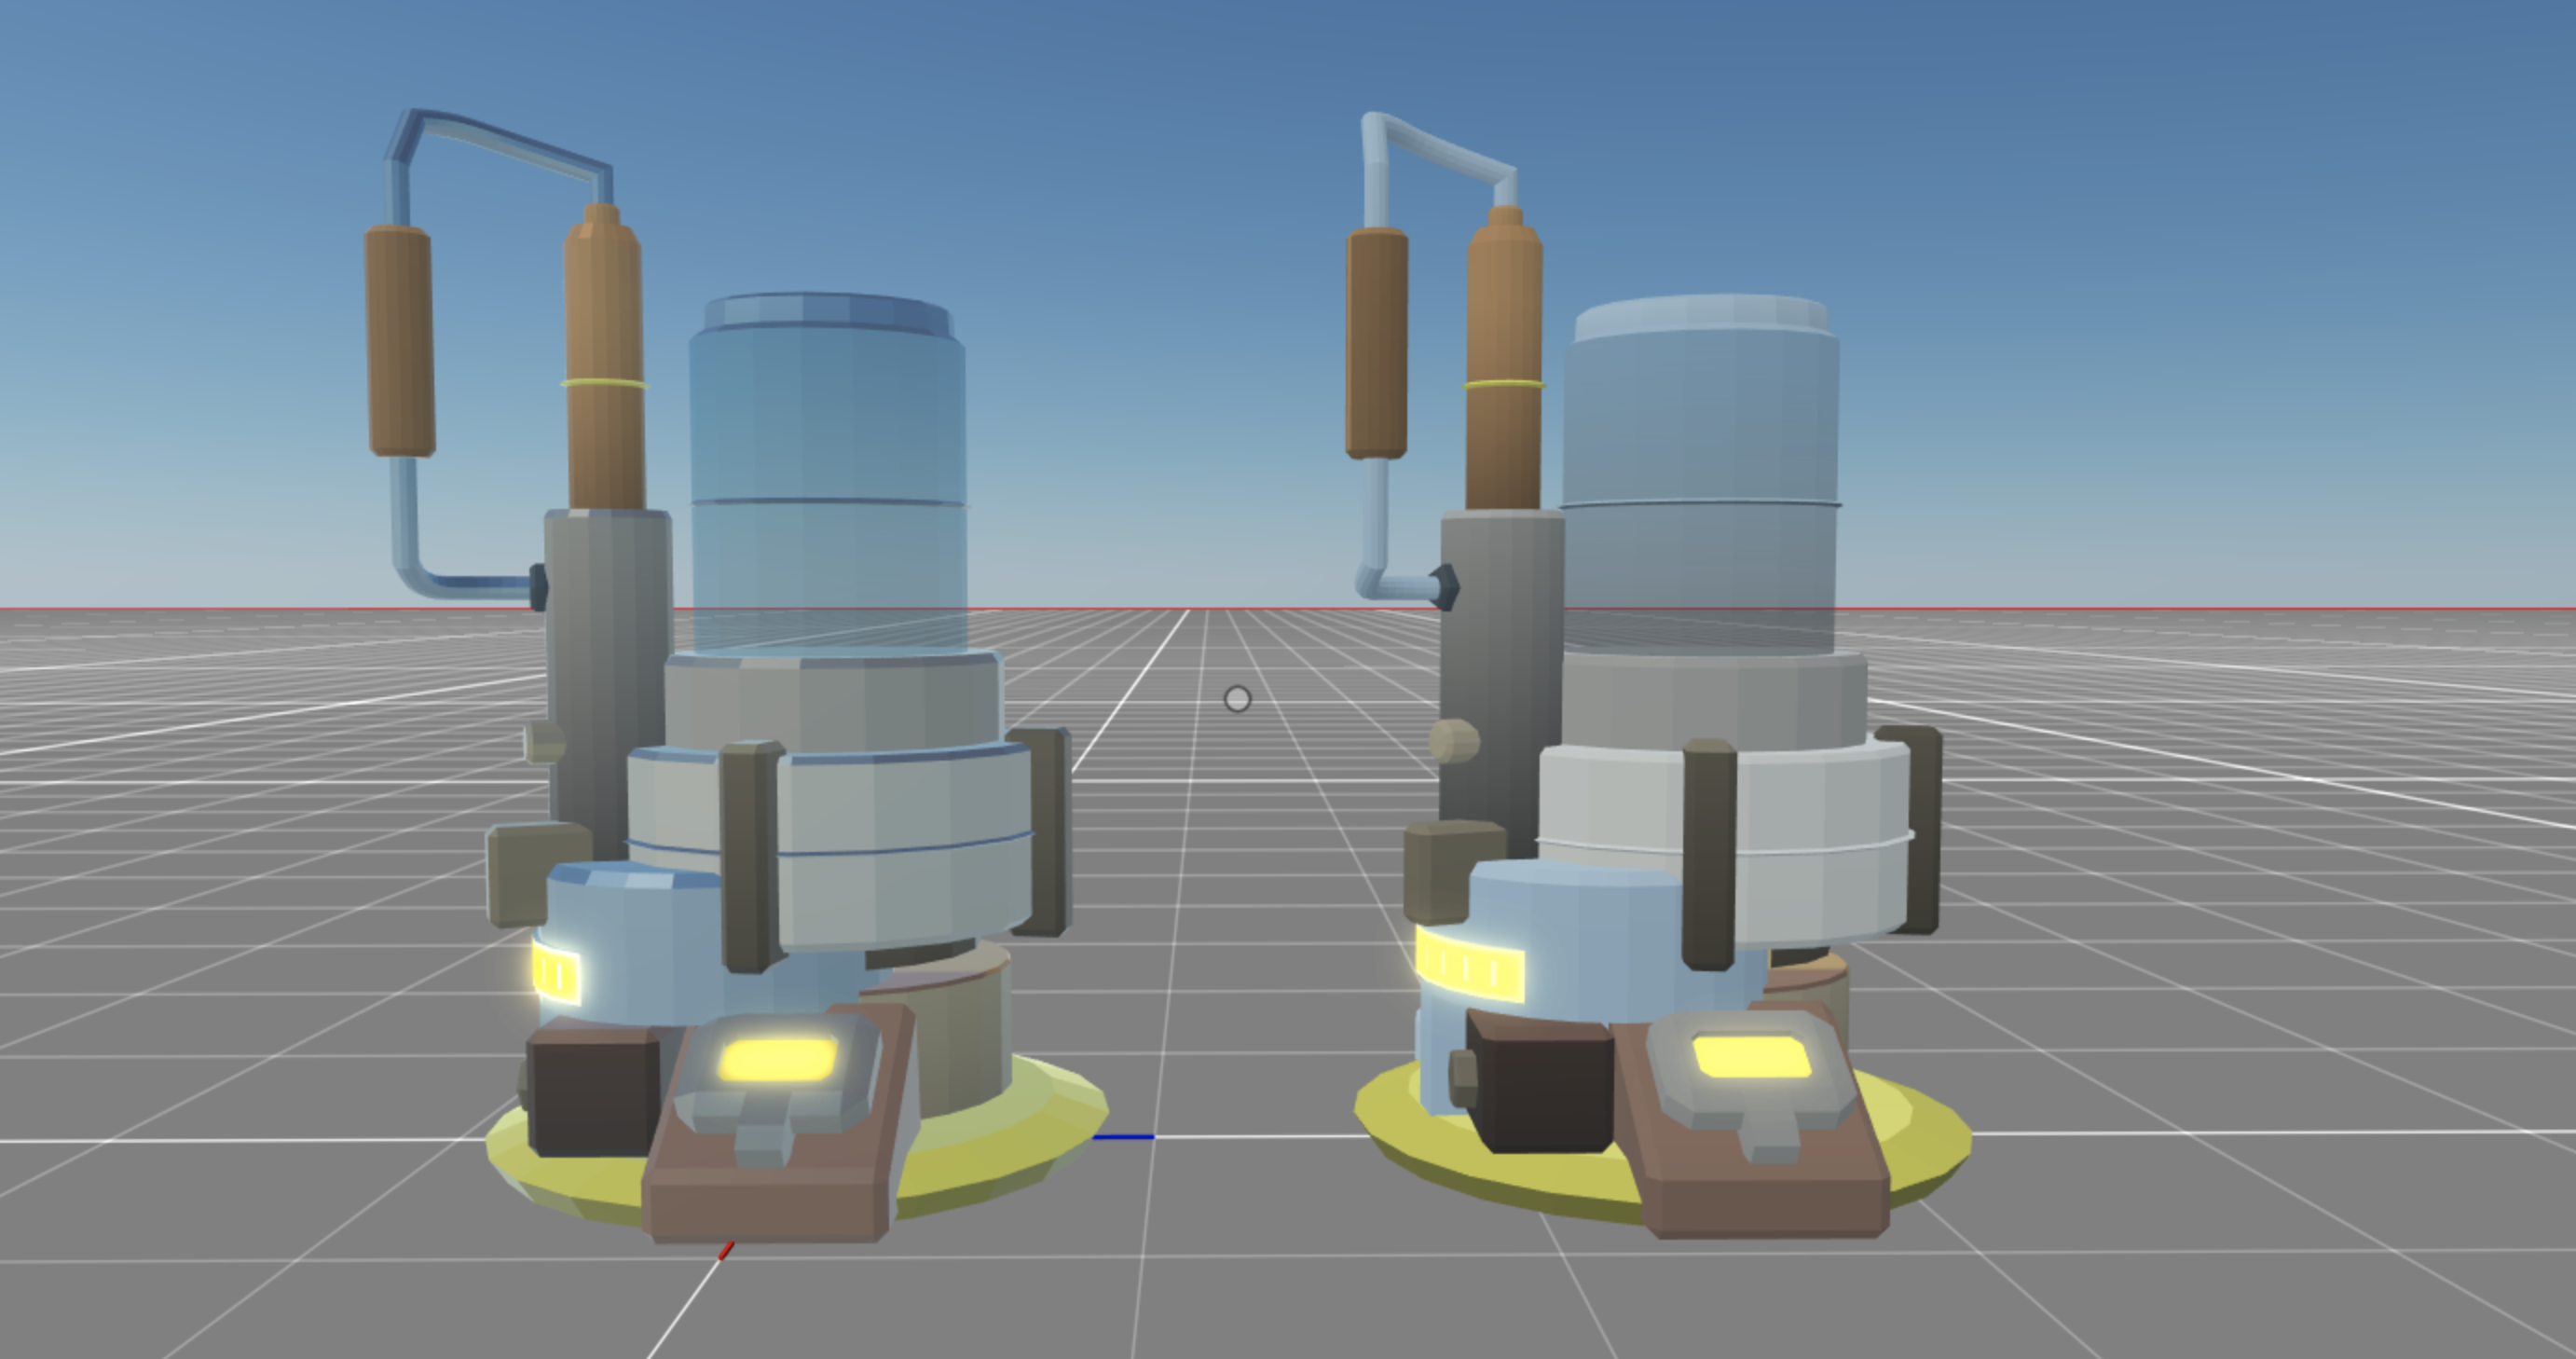
The image below shows two identical models, created with the same colors and textures. The model on the left uses all PBR materials, some of them include metalness, transparency, and emissiveness. The model on the right uses all standard materials, some including transparency and emissiveness.
Transparent materials
You can set a material to be transparent. Transparent materials can be seen through to varying degrees, depending on their alpha. To do this, activate the transparency property of the material and then set its alpha to the desired amount. An alpha of 1 will make the material completely opaque, an alpha of 0 will make it invisible.
The image below shows two identical models created with standard materials. The one on the left uses only opaque materials, the one on the right uses both transparent and opaque materials in some of its parts.
![]()
There are two main different transparency modes: Aplha Clip and Aplha Blend.
Alpha Clip sets that each part of a model is either 100% opaque or 100% transparent. Alpha Blend allows you to pick intermediate values per region.
![]()
Unless you specifically want to be able to have an intermediate level of transparency, it’s always better to use Alpha Clip.
Emissive materials
You can also make a material emissive. Emissive materials cast their own light. Note that when rendered, they don’t actually illuminate nearby objects in the scene, they just seem to have a blurred glow around them.
The image below shows two identical models created with standard materials. The one on the right has glowing emissive materials on some of its surfaces.
![]()
To make a material emissive in Blender, simply add an emission shader to the material.
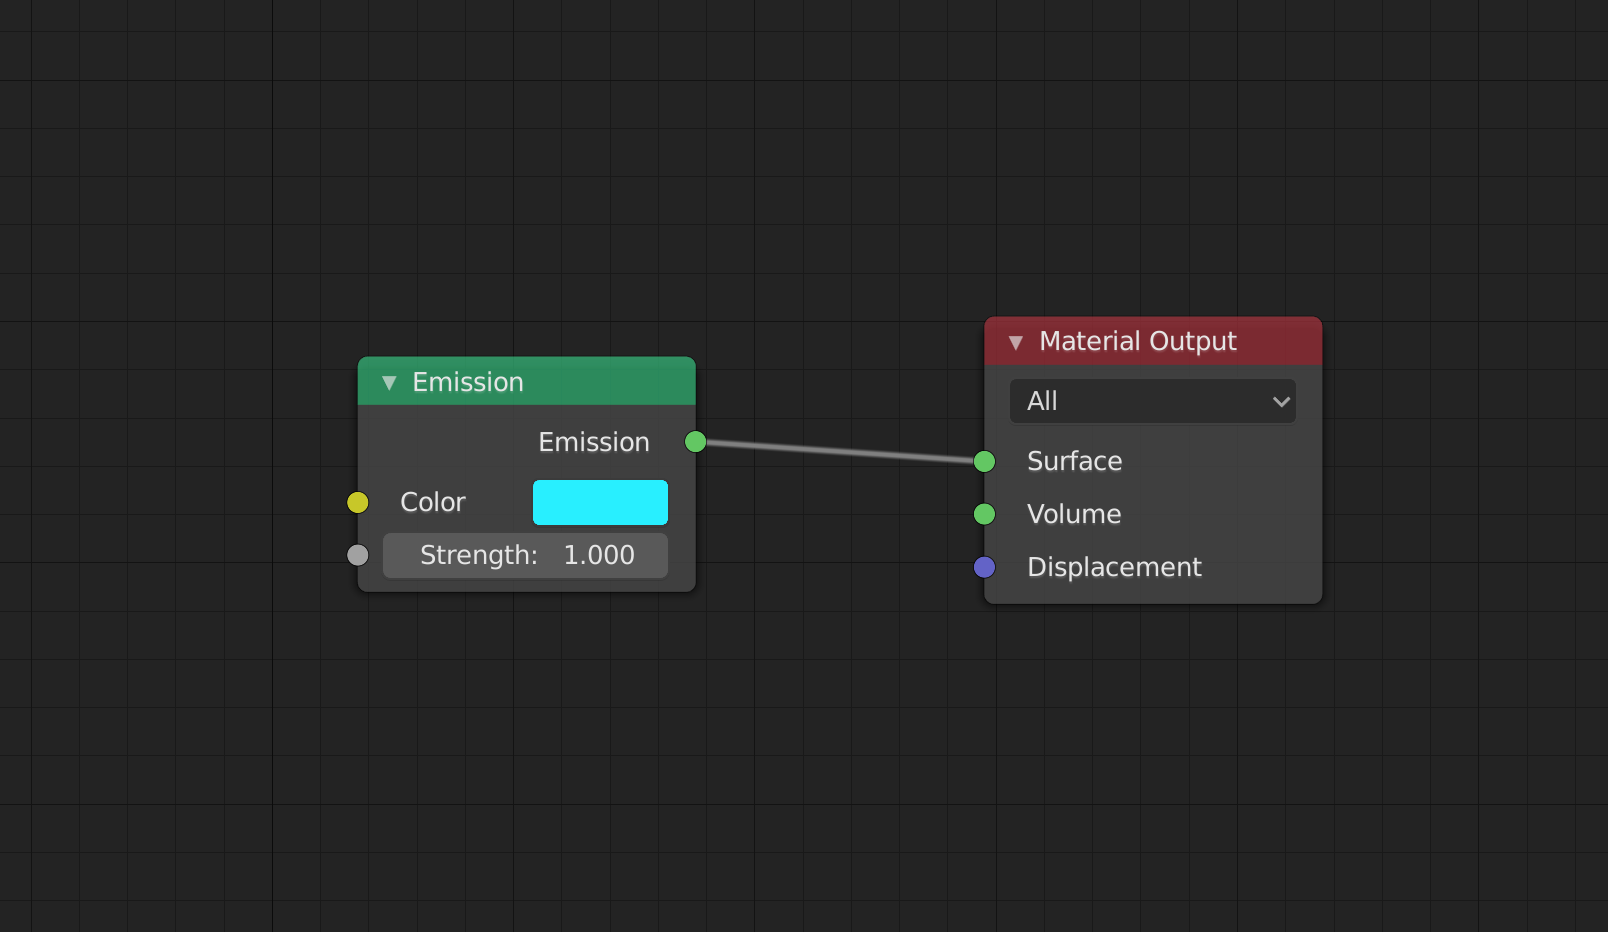
To make a material both emissive and have a texture, you can use two shaders in parallel, one of the emission and another principled BDSF for the texture. You can then use a mix shader node to join them.

Tip: By using a color atlas as a texture, you can get away with having various possible colors counted as a single texture. This is useful for making sure you don’t exceed the scene limitations.
Soften an emissive
The emission shader has a strength property that can lower the glow of an emissive material. However, due to a known issue with the .glTF specification, an exported .glTF or .glb file doesn’t retain this property. When importing the model into a Decentraland scene it will always have the emissive strength at 100%.
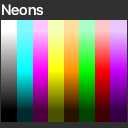
To make a material glow less, the best workaround is to set the color property on the emission shader to something less bright, or to reference a color from a texture that is less bright.
For example, if using the below color map, you can achieve a less bright emissive material by picking a color from the bottom half of the image. Anything on the top half will be fully emissive, but as you go lower the material will have less glow.
Vertex painting
Vertex painting of 3D models isn’t currently supported by Decentraland’s engine. We recommend using texture mapping with a pallette of plain colors for a similar effect.
Textures
Textures can be embedded into the exported glTF file or referenced from an external file. Both ways are supported.
Default textures
All of the assets from the default Decentraland asset libraries (available in the Builder or as wearables) share a set of optimized plane textures. These textures are pre-loaded by players when they open the explorer, which makes these assets a lot faster to load.
If you build your own custom 3D models and use these same Decentraland default textures, your assets will also load faster when players walk to your parcels.
These textures are composed of a palette of plain colors, that you can map to different parts of a 3D model.
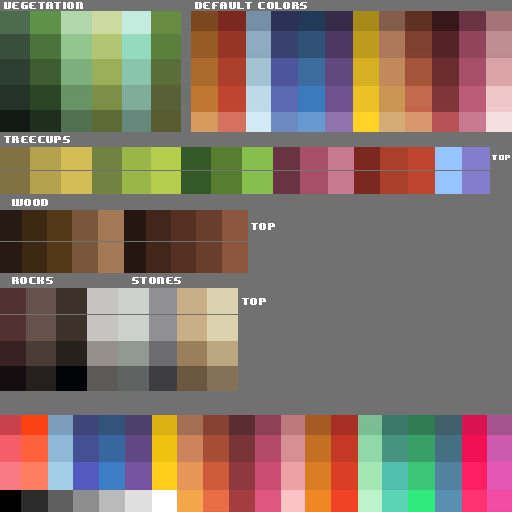
You can find the full collection of Decentraland default textures in this repo
Lighting conditions
It’s currently not possible to have custom light sources in a Decentraland scene. You may want to consider baking lighting into a texture, for example to simulate a lighting focal point on a wall.
Note that objects cast shadows over others. The default lighting conditions have a light source that is positioned at 45 degrees on all three axis.
Emissive materials aren’t affected by shadows from other objects, but they do cast their own shadow.
Texture size constraints
Texture sizes must use width and height numbers (in pixels) that match the following numbers:
1, 2, 4, 8, 16, 32, 64, 128, 256, 512
This sequence is made up of powers of two:
f(x) = 2 ^ x. 512 is the maximum number we allow for a texture size. This is a fairly common requirement among other rendering engines, it’s there due internal optimizations of the graphics processors.
The width and height don’t need to have the same number, but they both need to belong to this sequence.
The recommended size for textures is 512x512, we have found this to be the optimal size to be transported through domestic networks and to provide reasonable loading/quality experiences.
Examples of other valid sizes:
32x32
64x32
512x256
512x512
Although textures of arbitrary sizes work in the alpha release, the engine displays an alert in the console. We will enforce this restriction in coming releases and invalid texture sizes will cease to work.
Normal maps
You can add an additional normal map to a texture to control how reflections bounce off different regions of a same model. This can be used to achieve very interesting and realistic effects. It also allows you to keep the textures themselves lighter, as some detail can be provided on the normal map layer instead.
The colors on the normal map are not to be taken literally, but instead map to what direction light bounces off to. Darker parts of the texture will reflect less light.
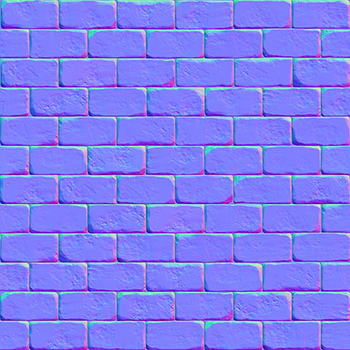
For example in this brick wall can be overlayed on a texture that matches the same brick positions. The different color mapping implies that the blue bricks will bounce light forward. The green margins on the top bounce light upwards. The cracks between the bricks reflect a lot less light. This is a great way to get the lighting on the wall behave more realistically, without having to spend geometry on each individual brick.
NOTE: Never use the same texture file for both the texture of an object and its normal map. Create a separate file and name it differently. Models in deployed scenes are compressed by the content servers, and normal maps are compressed differently to other textures. The compressed model might end up looking very different if the server compresses a texture as a normal map or viceversa.
How to swap a material
Suppose you’ve imported a 3D model that uses a material that’s not supported by Decentraland. You can easily change this material while still keeping the same texture and its mapping.
To swap the material:
- Check the current material’s settings to see what texture files are being used and how they are configured.
-
Delete the current material from the mesh.

-
Create a new material.
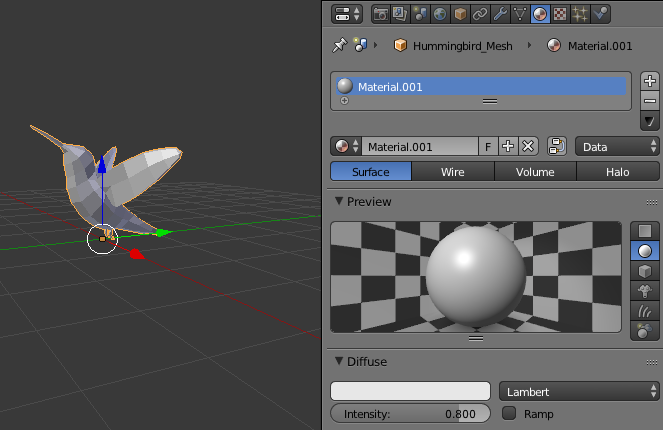
Tip: If you’re using Blender and are on the Blender Render tab, it creates a basic material by default, which is supported by Decentraland.
-
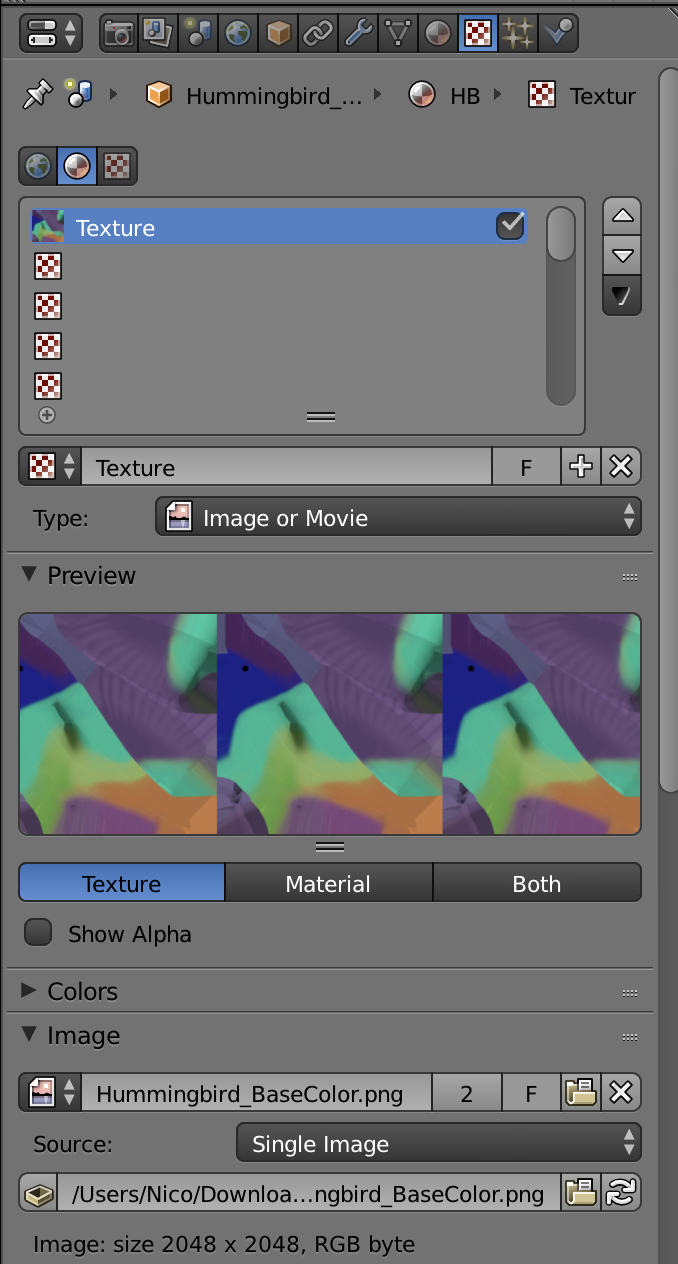
Open the Textures settings and create a new texture, importing the same image file that the original material used.
-
The texture should be mapped to the new material just as it was mapped to the old material.
Best practices for materials
-
If your scene includes multiple models that use the same texture, reference the texture as an external file instead of having it embedded in the 3D model. Embedded textures get duplicated for each model and add to the scene’s size. .glb files have their textures embedded by default, but you can use glTF pipeline to extract it outside.
Note: After referencing a file for a texture that won’t be embedded, make sure that file won’t be moved or renamed, as otherwise the reference to the file will be lost. The file must also be inside the scene folder so that it’s uploaded together with the scene.
- Use the Decentraland default textures, which are pre-loaded by players, making your assets render a lot faster.
- Read this article for a detailed overview of a full art pipeline that uses PBR textures in glTF models.
- You can find a detailed reference about how to create glTF compatible materials with Blender in Blender’s documentation.
- Find free, high quality PBR textures in cgbookcase.
- When setting transparency of a material, try to always use Alpha clip rather than Alpha blend, unless you specifically need to have a material that’s partially transparent (like glass). This will avoid problems where the engine renders the wrong model in front of the other.