Preview your scene
Once you have built a new scene or downloaded a scene example you can preview it locally.
Before you begin
Please make sure you first install the CLI tools by running the following command:
npm install -g decentraland
See the Installation Guide for more details instructions.
Preview a scene
To preview a scene run the following command on the scene’s main folder:
dcl start
Any dependencies that are missing are installed and then the CLI opens the scene in a new browser tab automatically. It creates a local web server in your system and points the web browser tab to this local address.
Every time you make changes to the scene, the preview reloads and updates automatically, so there’s no need to run the command again.
Note: Some scenes depend on an external server to store a shared state for all players in the scene. When previewing one of these scenes, you’ll likely have to also run the server locally on another port. Check the scene’s readme for instructions on how to launch the server as well as the scene.
Upload a scene to decentraland
Once you’re happy with your scene, you can upload it and publish it to Decentraland, see publishing ) for instructions on how to do that.
Parameters of the preview command
You can add the following flags to the dcl start command to change its behavior:
-
--portto assign a specific port to run the scene. Otherwise it will use whatever port is available. -
--no-debugDisable the debug panel, that shows scene and performance stats -
--no-browserto prevent the preview from opening a new browser tab. -
--wor--no-watchto not open watch for filesystem changes and avoid hot-reload -
--cor--ciTo run the parcel previewer on a remote unix server -
--web3Connects preview to browser wallet to use the associated avatar and account -
--skip-version-checksAvoids checking if the scene’s ECS library version matches your CLI version, and launches the preview anyway. -
--desktop-clientRuns the preview in the Decentraland Desktop client
Note: To preview old scenes that were built for older versions of the SDK, you must set the corresponding version of
decentraland-ecsin your project’spackage.jsonfile.
Preview scene size
The scene size shown in the preview is based on the scene’s configuration, you set this when building the scene using the CLI. By default, the scene occupies a single parcel (16 x 16 meters).
If you’re building a scene to be uploaded to several adjacent parcels, you can edit the scene.json file to reflect this, listing multiple parcels in the “parcels” field. Placing any entities outside the bounds of the listed parcels will display them in red.
 "scene": {
    "parcels": [
      "0,0",
      "0,1",
      "1,0",
      "1,1"
    ],
    "base": "0,0"
  },
Tip: While running the preview, the parcel coordinates don’t need to match those that your scene will really use, as long as they’re adjacent and are arranged into the same shape. You will have to replace these with the actual coordinates later when you deploy the scene.
Run preview in Desktop
To run a preview scene in the Desktop native client, instead of in the web browser:
1) Make sure you have downloaded and installed the Windows or Mac desktop client.
2) Run the preview with:
`dcl start --desktop-client`
3) Copy the URL provided by the console output under Desktop Client and paste in your browser.
> Note: The Browser might ask you for permission to open an external executable: Decentraland. Select **Open**.
4) You’ll see the following screen. Check that the URL is correct, then click Continue to launch the preview.

If you need to manually add anything to the URL, to change the default way the scene runs, tick the box **Add custom URL parameters** and write those in the dialog below.
Debug a scene
Running a preview provides some useful debugging information and tools to help you understand how the scene is rendered. The preview mode provides indicators that show parcel boundaries and the orientation of the scene.
If the scene can’t be compiled, you’ll just see the grid on the ground, with nothing rendered on it.
If this occurs, there are several places where you can look for error messages to help you understand what went wrong:
- Check your code editor to make sure that it didn’t mark any syntax or logic errors.
- Check the output of the command line where you ran
dcl start - Check the JavaScript console in the browser for any other error messages. For example, when using Chrome you access this through
View > Developer > JavaScript console. - If you’re running a preview of a multiplayer scene that runs together with a local server, check the output of the command line window where you run the local server.
If an entity is located or extends beyond the limits of the scene, it will be displayed in red to indicate this, with a red bounding box to mark its boundaries. Nothing in your scene can extend beyond the scene limits. This won’t stop the scene from being rendered locally, but it will stop the offending entities form being rendered in Decentraland.
Tip: Before you deploy your scene to the production environment, deploy it to the test environment to try it in a context that is a lot closer to production. See Development Workflow
Use the console
Output messages to console (using log()). You can then view these messages as they are generated by opening the JavaScript console of your browser. For example, when using Chrome you access this through View > Developer > JavaScript console.
You can also add debugger commands or use the sources tab in the developer tools menu to add breakpoints and pause execution while you interact with the scene in real time.
Once you deploy the scene, you won’t be able to see the messages printed to console when you visit the scene in-world. If you need to check these messages on the deployed scene, you can turn the scene’s console messages back on adding the following parameter to the URL: DEBUG_SCENE_LOG.
View scene stats
The lower-left corner of the preview informs you of the FPS (Frames Per Second) with which your scene is running. Your scene should be able to run above 25 FPS most of the time.
Click the Y key to open the Panel. This panel displays the following information about the scene, and is updated in real time as things change:
- Processed Messages
- Pending on Queue
- Scene location (preview vs deployed)
- Poly Count
- Textures count
- Materials count
- Entities count
- Meshes count
- Bodies count
- Components count
The processed messages and message queue refer to the messages sent by your scene’s code to the engine. These are useful to know if your scene is running more operations than the engine can support. If many messages get queued up, that’s usually a bad sign.
The other numbers in the panel refer to the usage of resources, in relation to the scene limitations. Keep in mind that the maximum allowed number for these values is proportional to the amount of parcels in the scene. If your scene tries to render an entity that exceeds these values, for example if it has too many triangles, it won’t be rendered in-world once deployed.
Note: Keeping this panel open can negatively impact the frame rate and performance of your scene, so we recommend closing it while not in use.
Run code only in preview
You can detect if a scene is running as a preview or is already deployed in production, so that the same code behaves differently depending on the case. You can use this to add debugging logic to your code without the risk of forgetting to remove it and having it show in production.
To use this function, import the @decentraland/EnvironmentAPI library.
import { isPreviewMode } from '@decentraland/EnvironmentAPI'

executeTask(async () => {
  const preview: boolean = await isPreviewMode()

  if (preview){
    log("Running in preview")
  }
}
Note:
isPreviewMode()needs to be run as an async function, since the response may delay in returning data.
Dependency versions
Running a Decentraland scene locally depends on two main libraries: decentraland (the CLI, which is installed globally on your machine) and decentraland-ecs, which is installed on each project folder. Make sure both of those are up to date, as any issues you’re experiencing might already be fixed in newer versions. There may also be compatibility problems when attempting to run with one of these two outdated and the other up to date. You can run the following commands to update both these libraries to the latest stable version:
npm i -g decentraland@latest
npm i decentraland-ecs@latest
If you’re using any of the utils libraries make sure those are also up to date, as older versions of these libraries may not be compatible with newer versions of decentraland-ecs.
The decentraland-ecs library has in turn a couple of internal dependencies that are installed with it: the renderer and the kernel. Each decentraland-ecs version is paired with its corresponding versions of both. In occasions, it may be useful to try switching versions of these dependencies independently, to better pinpoint where an issue has originated. You can force your preview to use a different version of the renderer or of the kernel by simply providing the url parameters renderer-version and kernel-version, pointing at a specific commit.
For example, you can run your preview with the following URL:
http://127.0.0.1:8000/?position=0%2C0&SCENE_DEBUG_PANEL&renderer-version=1.0.12119-20210830195045.commit-a8be53a
To find out what versions are available to choose from on each dependency, check the version history on the NPM pages for the Renderer and for the Kernel. To know what versions of these dependencies are in use by default by a specific decentraland-ecs version, you can run the following command, indicating the decentraland-ecs version you’re curious about:
npm info [email protected]
View bounding boxes
While running a scene preview, open the debug menu (on the right of the minimap) and click Bounding Boxes to toggle the visualization of bounding boxes on and off.
Bounding boxes are displayed as thin white boxes around each mesh. Bounding boxes show the limits of the space occupied by a 3d model. Every mesh in a 3d model has its own bounding box.
When Decentraland’s engine checks if an entity is within the scene limits, it looks at the positions of each corner of the bounding box. Checking the corners of the bounding boxes is an engine optimization, as checking the position of each vertex in the model would be a lot more work. Ideally the bounding box shouldn’t extend beyond the visible vertexes of the model, but it may not be the case if the model wasn’t carefully built with this in mind.
By visualizing bounding boxes, you can debug problems with entities being reported as outside the scene limits.
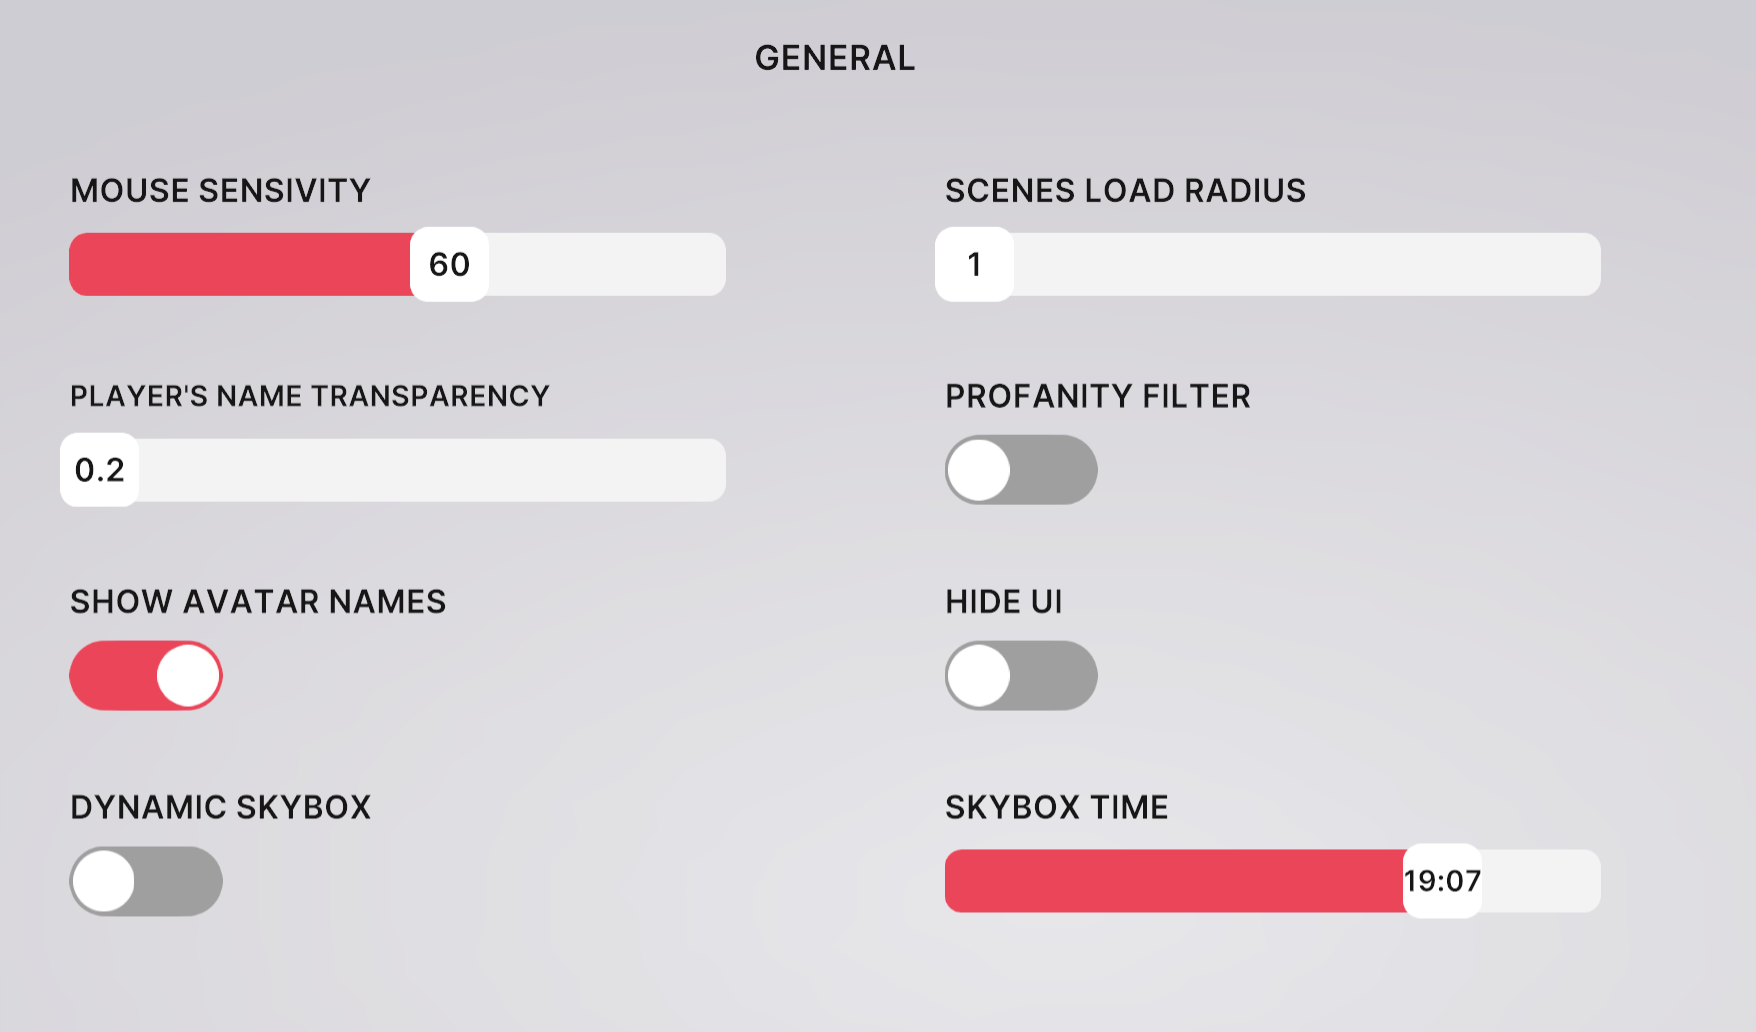
Lighting conditions
The in-world time of day has a big impact on how 3d models look. The color of the light source changes subtly, having a bluish tint at night, and a reddish tint during sunrise and sunset. The direction of the light also moves across the sky, casting shadows in different directions.
Check that your scene looks good at all times of day by switching the game clock to different values. Open the settings panel, and in the General tab set the skybox time to any time you prefer. If this slider is grayed out, make sure that the Dynamic skybox option is disabled.
Your 3d model’s materials might not look the same as they did in the modeling tool you created it with. This is to be expected, as all 3d rendering engines have subtle differences in how they deal with light and materials.
Avatars and accounts
When you run a preview, you’re assigned a random avatar each time you reload.
To use a consist avatar across your sessions, you can store an avatar profile by adding a PLAYER parameter to the URL with any string as its value. When using this, the preview will store your avatar’s settings locally on your browser, to retrieve them whenever you use the same string on the PLAYER parameter. For example, every time you open the preview with the URL http://127.0.0.1:8000/?PLAYER=ringo, you’ll have the same avatar.
To use the avatar that’s linked to your active Metamask account, with access to all of your owned wearables, start the preview with:
dcl start --web3
Connecting to Ethereum network
If your scene makes use of transactions over the Ethereum network, for example if it prompts you to pay a sum in MANA to open a door, you must add an additional parameter to the command when launching the preview:
dcl start --web3
Alternatively, you can manually add the URL parameter &ENABLE_WEB3 to the URL in the browser window.
Using the Ethereum test network
You can avoid using real currency while previewing the scene. For this, you must use the Ethereum Ropsten test network and transfer fake MANA instead. To use the test network you must set your Metamask Chrome extension to use the Ropsten test network instead of Main network. You must also own MANA in the Ropsten blockchain, which you can acquire for free from Decentraland.
Any transactions that you accept while viewing the scene in this mode will only occur in the test network and not affect the MANA balance in your real wallet.
Multiplayer testing
If you open a second preview window on your machine, you will enter the scene with a different avatar. The avatars on both tabs will be able to see each other and interact, although currently they might have inconsistent names and wearables on.
Note: You can’t open multiple tabs using the same account. So if your URL has a hardcoded
PLAYERparameter with the same string on multiple tabs, or you’re connecting to Metamask on more than one tab, it won’t be possible to load them all. Each simultaneous tab should load a different account.
If the scene uses the MessageBus to send messages between players, these will work between the different tabs.
If the scene connects to a third party server via websockets, these connections should also work independently on each tab, as separate players.