Systems
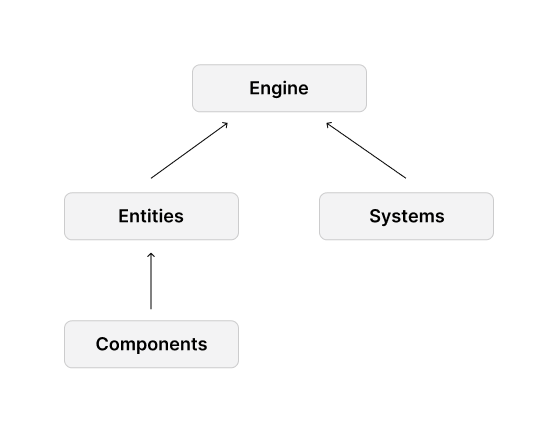
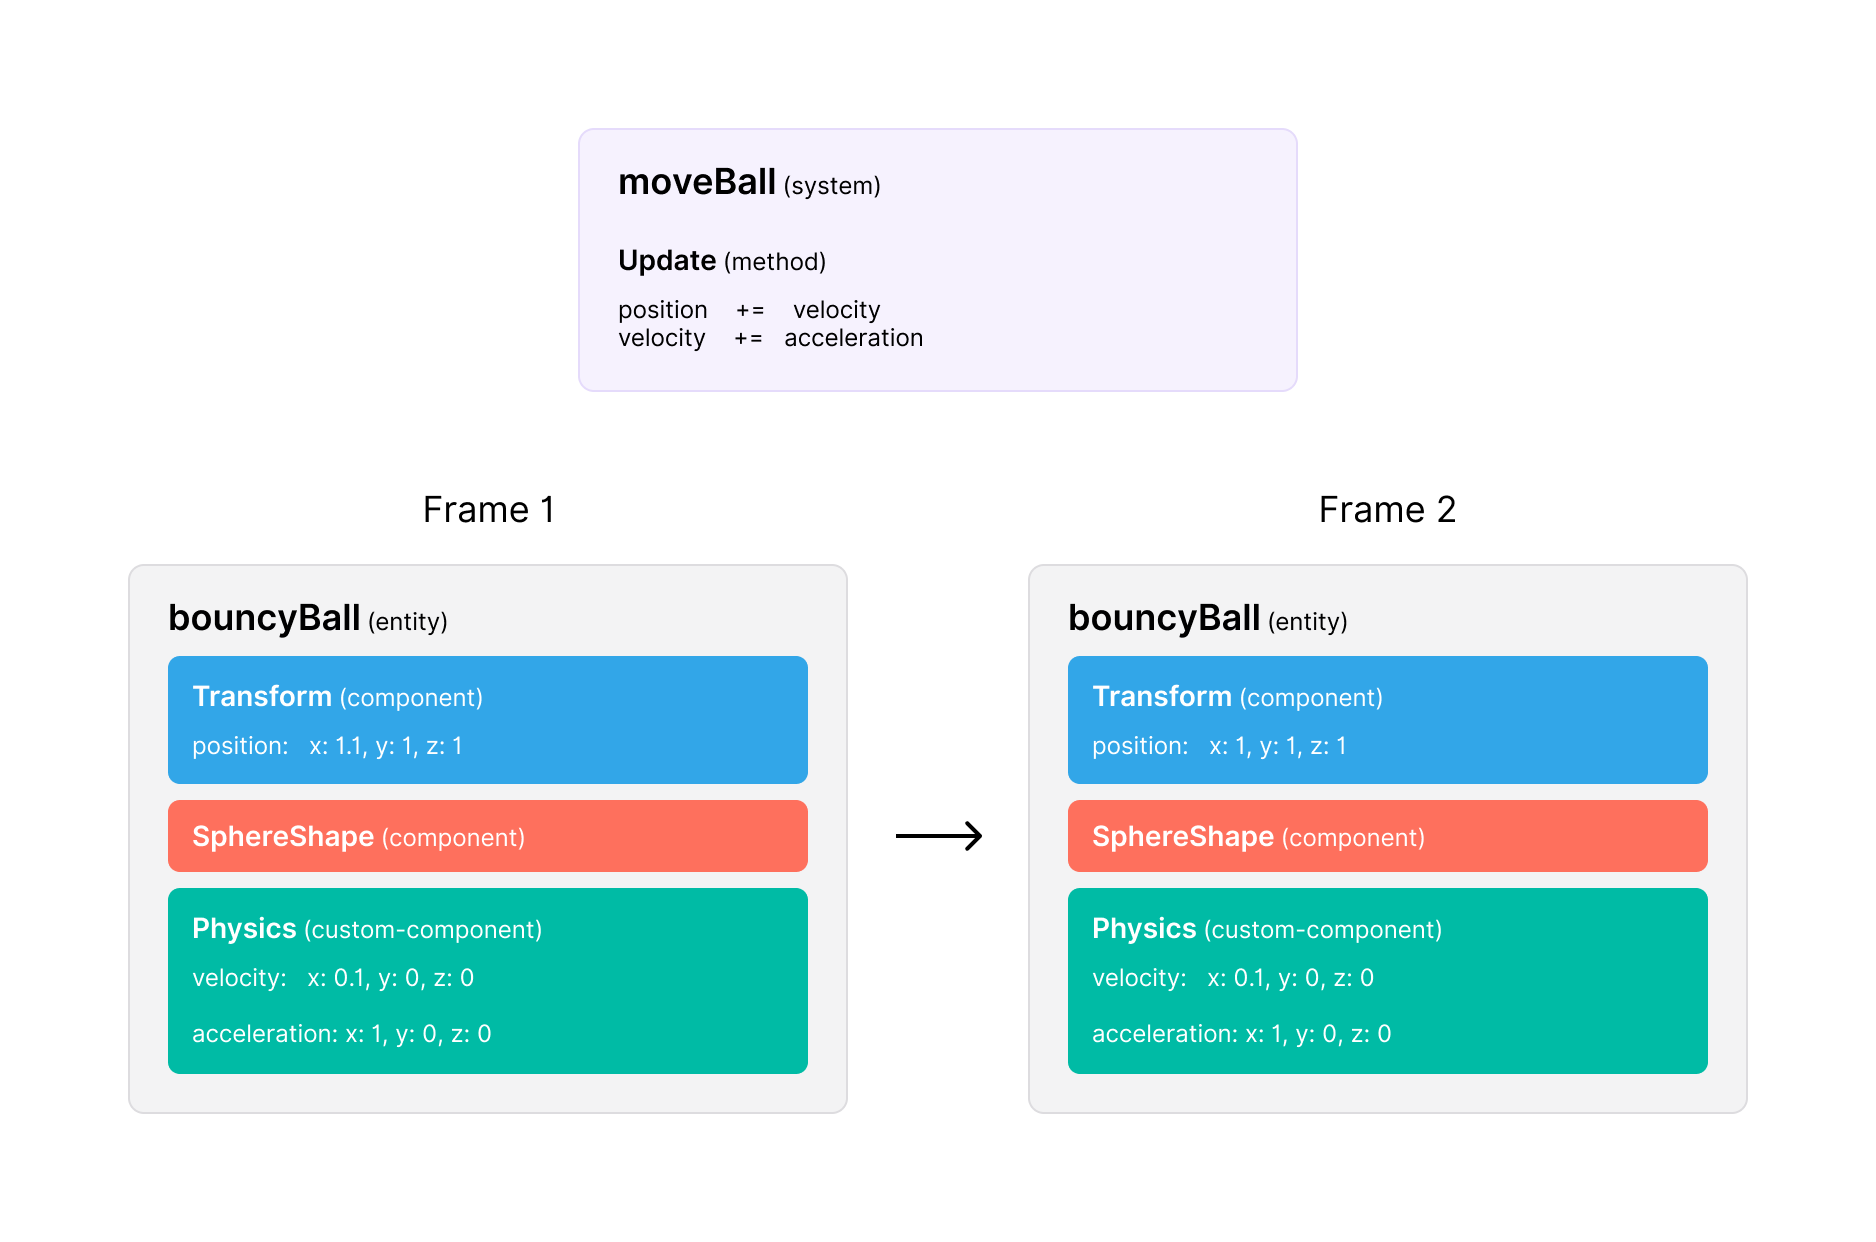
Decentraland scenes rely on systems to update the information stored in each entity’s components as the scene changes.

systems are what make scenes dynamic, they’re able to execute functions periodically on every frame of the scene’s game loop, changing what will be rendered.
The following example shows a basic system declaration:
// Define the system
export class MoveSystem implements ISystem {
  // This function is executed on every frame
  update() {
    // Iterate over the entities in an component group
    for (let entity of myEntityGroup.entities) {
      let transform = entity.getComponent(Transform)
      transform.translate(Vector3.Forward)
    }
  }
}

// Add system to engine
engine.addSystem(new MoveSystem())
In the example above, the system MoveSystem executes the update() function of each frame of the game loop, changing position of every entity in the scene.
Note: You must add a System to the engine before its functions can be called.
All systems act upon entities, changing the values stored in the entity’s components.

Tip: As a simpler alternative to create custom systems, you can use the helpers in the utils library. The library creates systems in the background that handle common tasks like moving or rotating entities. In most cases, this library only requires a single line of code to apply these behaviors.
You can have multiple systems in your scene to decouple different behaviors, making your code cleaner and easier to scale. For example, one system might handle physics, another might make an entity move back and forth continuously, another could handle the AI of characters.
Multiple systems can act on a single entity, for example a non-player character might move on its own based on its AI but also be affected by gravity when trying to walk from off a cliff.
The update method
The update() method is a boilerplate function you can extend to define the functionality of a system. It’s meant to be overwritten and interfaces with the engine in pre-established ways.
The update() method of a system is executed periodically, once per every frame of the game loop. This happens automatically, you don’t need to explicitly call this function from anywhere in your code.
Typically, the update() method is where you add most of the logic implemented by the system.
In a Decentraland scene, you can think of the game loop as the aggregation of all the update() functions in your scene’s systems.
Loop over a component group
Most of the time, you won’t want a system’s update function to iterate over the entire set of entities in the scene, as this could be very costly in terms of processing power. To avoid this, you can create a component group to keep track of which are the relevant entities, and then have your system iterate over that list.
For example, your scene can have a PhysicsSystem that calculates the effect of gravity over the entities of your scene. Some entities in your scene, such as trees, are fixed, so it would make sense to avoid wasting energy in calculating the effects of gravity on these. You can then define a component group that keeps track of entities that aren’t fixed and then have PhysicsSystem only deal with the entities in this group.
// Create component group
const movableEntities = engine.getComponentGroup(Physics)

// Create system
export class PhysicsSystem implements ISystem {
  update(dt: number) {
    // Iterate over component group
    for (let entity of movableEntities.entities) {
      // Calculate effect of physics
    }
  }
}
Handle a single entity
Some components and systems are meant for using only on one entity in the scene. For example, on an entity that stores a game’s score or perhaps on a gate of which there’s only one in the scene. To access one of those entities from a system, you don’t want to create a component group that holds just one single entity.
If you create the entity in the same file as you define the system, then you can simply refer to the entity or its components by name in the system’s functions.
export class UpdateScore implements ISystem {
  update(dt: number) {
    log(score.points)
    // ...
  }
}

const game = new Entity()
const score = new Score()
game.addComponent(score)
engine.addSystem(new UpdateScore(game))
For larger projects, we recommend that you keep system definitions on separate files from the instancing of entities. If you do that, then referring to the entity from the system is tougher, because you can’t just import the entity from game.ts to the module with the system.
Since systems are also objects, you are free to add variables to them, and also to define a constructor function to pass values to these variables.
export class UpdateScore implements ISystem {
  score: GameScore // the type is a custom component
  constructor(scoreComponent) {
    this.score = scoreComponent
  }
  update(dt: number) {
    log(this.score.points)
    // update values the score object
  }
}
When instancing the system in the game.ts file, you must pass it a reference to the component:
const game = new Entity()
const score = new Score()
game.addComponent(score)
engine.addSystem(new UpdateScore(game))

engine.addSystem(new UpdateScore(score))
Note: You could store this data in a custom object instead of an custom component, for more simplicity.
Execute when an entity is added
onAddEntity() is another boilerplate function of every system that you can overwrite with your own code.
Each time a new entity is added to the engine, this function is called once, passing the new entity as an argument.
export class mySystem implements ISystem {
  onAddEntity(entity: Entity) {
    // Code to run once
  }
}
Execute when an entity is removed
onRemoveEntity() is another boilerplate function of every system that you can overwrite with your own code.
Each time an entity is removed from the engine, this function is called once, passing the removed entity as an argument.
export class mySystem implements ISystem {
  onRemoveEntity(entity: Entity){
    // Code to run once
  }
}
Execute when a system is activated
The activate() function is another boilerplate function that is executed once when the system is activated.
export class mySystem implements ISystem {
  activate(){
    // Code to run once
  }
}
This can be useful when you have a system that must first carry out some initial steps, for example creating a set of materials of different colors that the update function of the system then switches between. The advantage of using the activate function instead of just executing these steps as soon as the scene starts, is that if your scene never uses the system, these steps won’t be executed.
Delta time between frames
The update() method always receives an argument called dt of type number (representing delta time), even when this argument isn’t explicitly declared.
export class mySystem implements ISystem {
  update(dt: number) {
    // Update scene
  }
}
delta time represents time that it took for the last frame to be processed, in seconds.
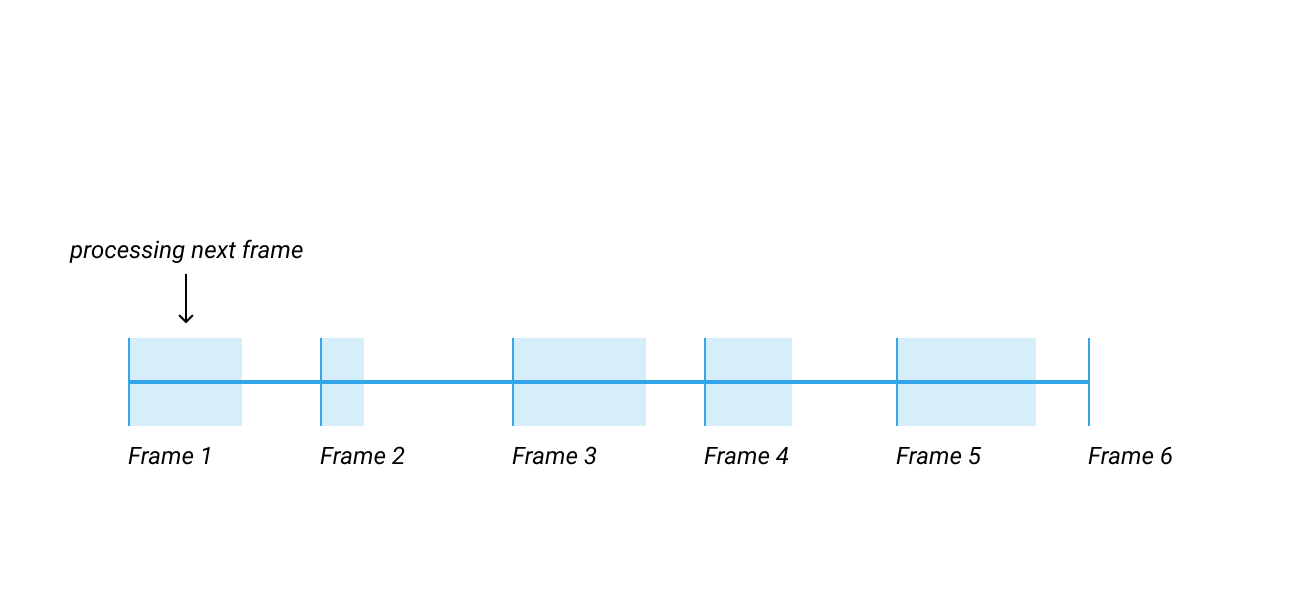
Decentraland scenes are updated by default at 30 frames per second. This means that the dt argument passed to all update() methods is generally equal to 30/1000.
If the processing of a frame takes less time than this interval, then the engine will wait the remaining time to keep updates regularly paced and dt will remain equal to 30/1000.

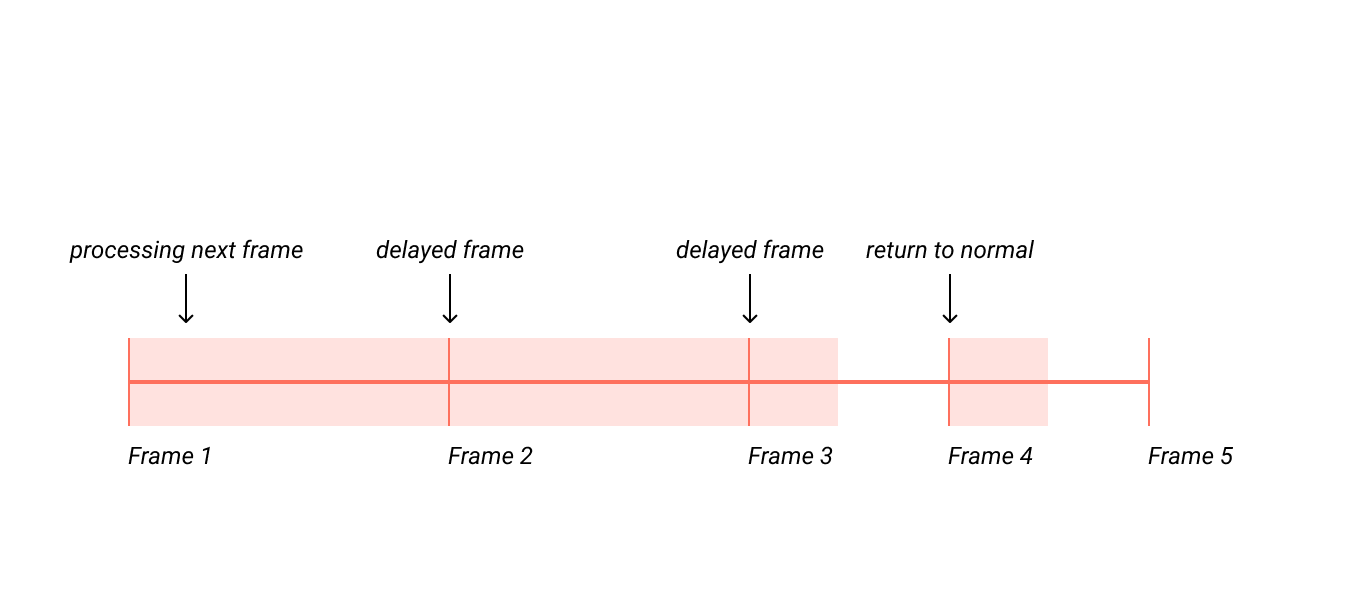
If the processing of a frame takes longer than 30/1000 seconds, the drawing of that frame is delayed. The engine then tries to finish that frame and show it as soon as possible. It then proceeds to the next frame and tries to show it 30/1000 seconds after the last frame. It doesn’t compensate for the previous delay.

Ideally, you should try to avoid having your scene reach this situation, as it causes a drop in framerate.
The dt variable becomes useful when frame processing exceeds the default time. Assuming that the current frame will take as much time as the previous, this information may be used to calculate how much to adjust change so that it remains steady and in proportion to the lag between frames.
See entity positioning for examples of how to use dt to make movement smoother.
Loop at a timed interval
If you want a system to execute something at a regular time interval, you can do this by combining the dt argument with a timer.
let timer: number = 10

export class LoopSystem {
  update(dt: number) {
    if (timer > 0) {
      timer -= dt
    } else {
      timer = 10
      // DO SOMETHING
    }
  }
}
For more complex use cases, where there may be multiple loops being created dynamically, it’s worth creating a component to store the timer.
// define custom component
@Component("timer")
export class Timer {
  totalTime: number
  timeLeft: number
  constructor(time: number) {
    this.totalTime = time
    this.timeLeft = time
  }
}

// component group to list all entities with a Timer component
export const timers = engine.getComponentGroup(Timer)

// system to update all timers
export class LoopSystem {
  update(dt: number) {
    for (let timerEntity of timers.entities) {
      let timer = timerEntity.getComponent(Timer)
      if (timer.timeLeft > 0) {
        timer.timeLeft -= dt
      } else {
        timer.timeLeft = timer.totalTime
        // DO SOMETHING
      }
    }
  }
}
System execution order
In some cases, when you have multiple systems running update() functions, you might care about what system is executed first by your scene.
For example, you might have a physics system that updates the position of entities in the scene, and another boundaries system that ensures that none of the entities are positioned outside the scene boundaries. In this case, you want to make sure that the boundaries system is executed last. Otherwise, the physics system could move entities outside the bounds of the scene but the boundaries system won’t find out till it’s executed again in the next frame.
When adding a system to the engine, set an optional priority field to determine when the system is executed in relation to other systems.
engine.addSystem(new PhysicsSystem(), 1)
engine.addSystem(new BoundariesSystem(), 5)
Systems with a lower priority number are executed first, so a system with a priority of 1 is executed before one of priority 5.
Systems that aren’t given an explicit priority have a default priority of 0, so these are executed first.
If two systems have the same priority number, there’s no way to know for certain which of them will be executed first.
Remove a system
An instance of a system can be added or removed from the engine to turn it on or off.
If a system isn’t added to the engine, its functions aren’t called by the engine.
To remove a system, you must first create a pointer to it when instancing it, so that you can refer to the system later.
// add system
let mySystemInstance = new mySystem()
engine.addSystem(mySystemInstance)

// remove system
engine.removeSystem(mySystemInstance)